The Rental Turn Process: A Step-by-Step Guide for Owners
October 21, 2026
The rental turn is everything that happens between one tenant handing back the keys and the next tenant getting them. It covers the move-out inspection, cleaning, repairs, safety checks, photos and listing, and the faster you run it, the fewer days the unit sits empty. This guide walks through the process in order, with a timeline, the legal pressure points, and the mistakes that turn a one-week job into a month of lost rent.
TL;DR
- A turn (also called a make ready) is the structured phase between tenancies: inspect, clean, repair, re-inspect, then market. Run it as a workflow with owners and due dates, not a pile of chores.
- Start before the tenant leaves. A pre-move-out inspection during the notice period lets you scope the work, order materials and book vendors while the unit is still occupied.
- Document everything with a checklist, photos and video. That record is what protects you in a security deposit dispute.
- Treat turn day as a compliance check too: heating, plumbing and smoke alarms are habitability items, not cosmetic ones.
- Know your state’s deposit deadline. In Texas, South Carolina and Missouri it is 30 days; Florida is 15 or 30 depending on whether you deduct.
Table of Contents
- What a rental turn actually includes
- The turn timeline, from notice to new move-in
- Step 1: Start while the tenant is still there
- Step 2: Run the move-out inspection like evidence gathering
- Step 3: Scope the work and sequence the trades
- Step 4: Treat the turn as a safety and habitability check
- Step 5: Re-inspect, photograph and list
- Step 6: Screen the next tenant correctly
- Security deposits: the deadline that shapes your turn
- Repair or improvement? The tax side of a turn
- Where turns go wrong
- Our perspective on the turn
- Handing the turn to a professional manager
- Frequently asked questions
- Sources
What a rental turn actually includes
Industry guidance describes the turn as the structured phase between one tenancy and the next, made up of cleaning, repairs, inspections and upgrades. The goal is to return the home to a decent, safe and sanitary condition, in line with housing codes, so it is ready for the next resident.
In practice, the work falls into five blocks:
- Move-out inspection and condition documentation.
- Cleaning and debris removal, including trash-outs when a tenant leaves belongings behind.
- Maintenance repairs and any planned upgrades.
- Final quality inspection, ideally by someone who did not do the work.
- Marketing readiness: photos, listing, showing access.
People search for this under several names: unit turnover, make ready, apartment turn, tenant turnover. They all describe the same loop. For a single-family rental it may involve one vendor and a handful of days. For a 200-unit community it is a continuous production line.
The turn timeline, from notice to new move-in
The table below shows a realistic sequence for a typical single-family or small multifamily unit. Actual durations depend on condition, vendor availability and local market. Treat the day counts as planning targets, not promises.
| Stage | When | What happens | Who usually owns it |
|---|---|---|---|
| Notice received | Day of notice | Confirm move-out date in writing, log the date, send move-out instructions | Property manager |
| Pre-move-out inspection | During the notice period | Walk the unit, note damage and cleaning needs, give the tenant an itemized list | Property manager |
| Scope and ordering | Before move-out | Draft work order, book vendors, order flooring, paint and appliances with long lead times | Manager and maintenance |
| Key return and move-out inspection | Move-out day | Photos, video, checklist signed or logged, locks changed | Property manager |
| Trash-out and cleaning | Days 1 to 2 after move-out | Remove debris, deep clean, pest and odor check | Cleaning crew |
| Repairs and paint | Days 2 to 5 | Patching, paint, flooring, fixtures, appliance fixes | Maintenance or vendors |
| Safety and systems check | Days 4 to 6 | Smoke alarms, heating and cooling, water heater, plumbing, GFCI outlets | Maintenance |
| Final inspection | Day 5 to 7 | Walk against the checklist, punch list for anything missed | Manager |
| Photos and listing | As soon as the unit is photo-ready | Update listing, schedule showings | Leasing team |
One published estimate puts an average turn at roughly one to three weeks, but treat that as a range, not a standard. Your own history, tracked unit by unit, is the better benchmark.
Step 1: Start while the tenant is still there
The most common mistake is waiting until the tenant is gone. NAAHQ’s turnover guidance for apartment operators recommends a pre-move-out inspection during the notice period. It lets you see likely damage, hand the tenant an itemized list of repairs and cleaning to complete so they can avoid deductions, and forecast the days the turn will take before the unit is vacant.
This step pays off three ways:
- Fewer surprises. You know about the stained carpet and the broken blinds before move-out day.
- Faster ordering. Flooring, appliances and cabinet hardware can have lead times longer than the cleaning and paint combined. Order them early.
- Better tenant behavior. A tenant who has a written list is more likely to clean and fix small items, which lowers your costs.
Put the notice in writing and confirm the date back to the tenant. Many leases and some local ordinances set notice periods, so check the lease and your local rules rather than assuming a number. A city handbook such as Fort Collins’ landlord-tenant guide shows how written notice and a forwarding address for the deposit are typically handled, though your state and city may differ.
Step 2: Run the move-out inspection like evidence gathering
The end of a lease is where expectations set at move-in get tested. A clear, consistent and well-documented move-out is the most effective way to reduce disputes over deposits.
Use a room-by-room checklist
HUD publishes a sample move-in/move-out inspection form that covers entry, living areas, kitchen, bedrooms and bathrooms, with a condition column for move-in and move-out and a cost-to-correct column. Use the same form at both ends of the tenancy so you compare like with like.
Add photos and video
Written checklists are standard. Time-stamped video of every room is the layer many owners skip. NARPM’s guidance points to video as a way to separate normal wear and tear from tenant-caused damage, which matters because wear and tear is the owner’s cost, not the tenant’s.
A quick rule of thumb many managers use for the distinction:
- Likely wear and tear: faded paint after several years, light carpet wear in walkways, minor nail holes.
- Likely tenant damage: pet-stained subfloor, holes in doors or walls, broken fixtures, burn marks on counters.
Your state’s statute and your lease control the final answer, so when a deduction is large or contested, check with a landlord-tenant attorney.
Step 3: Scope the work and sequence the trades
Treat the turn as a production line. A make ready board, physical or digital, standardizes tasks and makes progress visible, which supports accountability and shortens vacancy.
A simple board has four columns: To do, In progress, Ready for inspection, Done. Each unit is a card. Each card lists tasks, the person responsible, and a due date.
Sequencing matters more than speed. A sensible order:
- Trash-out and debris removal.
- Pest, odor and mold check.
- Repairs (drywall, doors, plumbing, electrical).
- Paint.
- Flooring.
- Fixtures and appliances.
- Deep clean (last, so dust from earlier trades does not undo it).
- Final inspection and photos.
The most common sequencing error is cleaning before painting or flooring. You pay for the same clean twice.
Decide what is worth upgrading
Not every turn needs an upgrade. Fresh neutral paint, a clean kitchen and working fixtures usually cover it. Bigger spends should be judged against the rent they can support. Our guide to the best renovations for your rental property covers which improvements tend to hold up, and our breakdown of rental turnover costs shows where a typical turn budget goes.
Step 4: Treat the turn as a safety and habitability check
Turn day is the one time the unit is empty, which makes it the best time to verify systems you cannot easily test when someone is living there. HUD’s NSPIRE standards prioritize health and safety, and functional heating, plumbing and smoke or fire alarms are treated as affirmative requirements rather than suggestions. Even if your property is not HUD-assisted, using that standard is a sound baseline.
A minimum safety pass on every turn:
- Test every smoke alarm and carbon monoxide alarm, and replace batteries or units past their service life.
- Run the heating and cooling and check filters. A general guide to HVAC inspections explains what a thorough system inspection looks at, and it is a useful reference for what to ask a technician to check, though local requirements vary.
- Run every faucet, toilet and drain. Look under sinks and around the water heater for leaks.
- Check GFCI outlets, exterior lighting and door and window locks.
- Change or rekey locks so that the previous tenant’s keys no longer work.
If a check fails, fix it before the unit is shown, not after the lease is signed.
Step 5: Re-inspect, photograph and list
A final inspection against the same checklist closes the loop. Have someone other than the person who did the work do it if you can. They will catch the missing outlet cover and the scuffed trim.
Then photograph the unit once, properly. These photos double as your move-in baseline for the next tenant, which makes the next turn’s inspection easier.
If you can, list the unit before the turn finishes. Listings built from the pre-move-out inspection can go live with an estimated available date, so showings overlap with repair work instead of following it. Seasonality matters here too, and our tips for leasing season cover how to time a vacancy around demand.
Step 6: Screen the next tenant correctly
A fast turn is wasted if you fill the unit with the wrong applicant, or if screening exposes you to liability. The FTC is clear that landlords using consumer reports must notify the applicant in writing of any adverse action, such as denying the application, requiring a co-signer or demanding a higher deposit based on the report. The notice also has to explain the applicant’s right to dispute inaccurate information.
Apply the same criteria to every applicant, document them, and keep copies. For the full sequence, see our six-step tenant screening process and our explanation of how a property manager screens prospective tenants.
Security deposits: the deadline that shapes your turn
Your turn schedule has to fit inside your state’s deposit rules. Deadlines and penalties vary, so check the statute for your property. According to one state-by-state summary:
| State | Return deadline | Penalty for non-compliance |
|---|---|---|
| Texas | 30 days | $100 plus up to 3x and attorney’s fees if bad faith |
| South Carolina | 30 days | 3x plus attorney’s fees |
| Missouri | 30 days | 2x |
| Florida | 15 days with no deductions, 30 days with deductions | Loss of the right to deductions |
That summary is a secondary source, so confirm against the current statute or with a local landlord-tenant attorney before you rely on it for a specific deduction. Two practical implications:
- Itemize. Deductions need a written, itemized list with real costs, tied to the checklist and photos.
- Do not wait for repairs to finish. You generally need to account for the deposit by the deadline, not complete every repair by then. Build your invoicing so the final numbers are ready in time.
Repair or improvement? The tax side of a turn
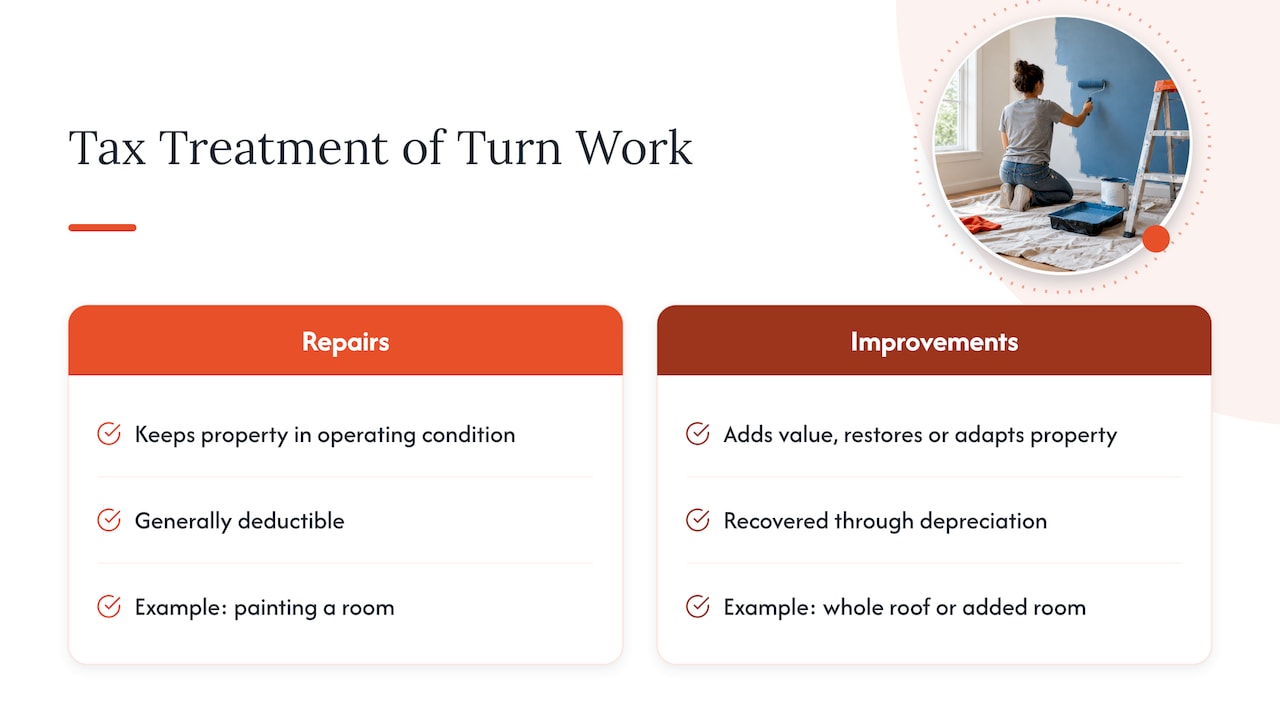
The IRS distinguishes between repairs, which keep the property in operating condition and are generally deductible, and improvements, which add value, restore or adapt the property and are recovered through depreciation. Painting a room is typically a repair. Replacing a whole roof or adding a room is an improvement.
Because a single turn often mixes both, ask the vendor to itemize invoices by task. Your CPA will thank you, and the line items also help when you compare turn costs across units. Keep the receipts with the unit file.
If you track costs against income, many investors use a rough 50% rule of thumb for operating expenses, excluding the mortgage. It is a rule of thumb used by investors, not a legal or tax rule, and it does not come from the IRS. Uncontrolled turn costs are one of the fastest ways to blow past it. Our guide to maintenance budgeting shows how to plan for them.
Where turns go wrong
A few patterns account for most of the lost days and lost deposits:
- No pre-move-out inspection. You find the damage after move-out and start ordering from zero.
- Vendors booked after the unit is vacant. Good trades have waiting lists. Book before the date.
- Vague scopes. “Paint and clean” invites change orders. List rooms, colors, and what is included.
- No single owner. If three people think someone else is checking the unit, nobody is.
- No photos. A deposit dispute without evidence is a coin toss.
- Skipping the safety pass. A failed smoke alarm found after move-in is a liability, not a punch-list item.
- Ignoring maintenance history. Repeated turn repairs on the same item usually signal a planned replacement, not another patch. Our overview of the three kinds of maintenance can help separate routine, reactive and planned work.
Our perspective on the turn
We have managed turns across many markets for more than 15 years, and across 2,700 properties served in 10 regional markets, the pattern is consistent: the turn is won or lost before move-out day. The unit that turns fast is the one where someone walked it during the notice period, wrote a scope and had vendors on the calendar.

That is why we organize around pods, small teams that know their properties and residents, and why we keep maintenance in-house. When the person who inspects the unit works with the technician who fixes it, scopes are tighter and handoffs shorter. Where we use outside vendors, we select them transparently, so owners can see why a vendor was chosen and what the work cost.
We also look at the turn as a retention question. Every resident who renews is a turn you do not pay for. Proactive communication during the lease, quick maintenance responses and a fair, well-documented move-out all feed the next renewal rate. The cheapest turn is the one that never happens, and the second cheapest is the one that is planned.
— MediaBeast
Handing the turn to a professional manager
If you own a single rental and live nearby, you can run this process yourself with a checklist and a reliable handyman. It gets harder with several units, an out-of-town property, or tight vacancy targets. That is where a management team earns its fee: coordinating inspections, vendors, screening and listing as one workflow.
At Auben Realty, property management includes leasing and tenant placement, maintenance and renovation oversight for single-family, multifamily and build-to-rent properties in markets including Charleston and Columbia, SC, Dallas-Fort Worth and Houston, TX, Kansas City and Overland Park, and Jacksonville, FL. If you want to talk through how a turn would run on your property, start there.
Frequently asked questions
What is a turnover checklist?
It is a standardized list used to document a property’s condition at move-in and move-out, room by room. It identifies repairs, verifies cleaning, and records damage so security deposit deductions can be justified. HUD’s sample inspection form is a good starting template.
What does rental turnover mean?
It means two things. One is the work of preparing a unit between tenants, also called a turn or make ready. The other is the rate at which tenants leave, which owners track because each departure triggers vacancy and turn costs.
What is the 50% rule in rental property?
It is an investor rule of thumb, not a law. It assumes operating expenses, excluding the mortgage, will run about half of gross rent, and it is used for quick cash flow estimates. Expensive or poorly managed turns can push a property past it, so compare it with your own actual numbers.
Should I inspect the unit before the tenant moves out?
Yes, where your lease and local law allow it and you give proper notice. A pre-move-out inspection lets you list needed repairs, give the tenant a chance to fix them, and order materials early. It is one of the simplest ways to shorten vacancy.
Sources
- Property management make ready board
- Apartment Turnover 2025, NAAHQ
- RESIDENTIALResource, NARPM
- Sample Move-In/Move-Out Inspection Form, HUD
- HUD NSPIRE press release
- Using Consumer Reports: What Landlords Need to Know, FTC
- Tips on rental real estate income, deductions and recordkeeping, IRS
- Landlord-Tenant Handbook, City of Fort Collins
- Security deposit return deadlines, all 50 states